3D Metal VR6 Emblem Badge: Peel-and-Stick Car Logo
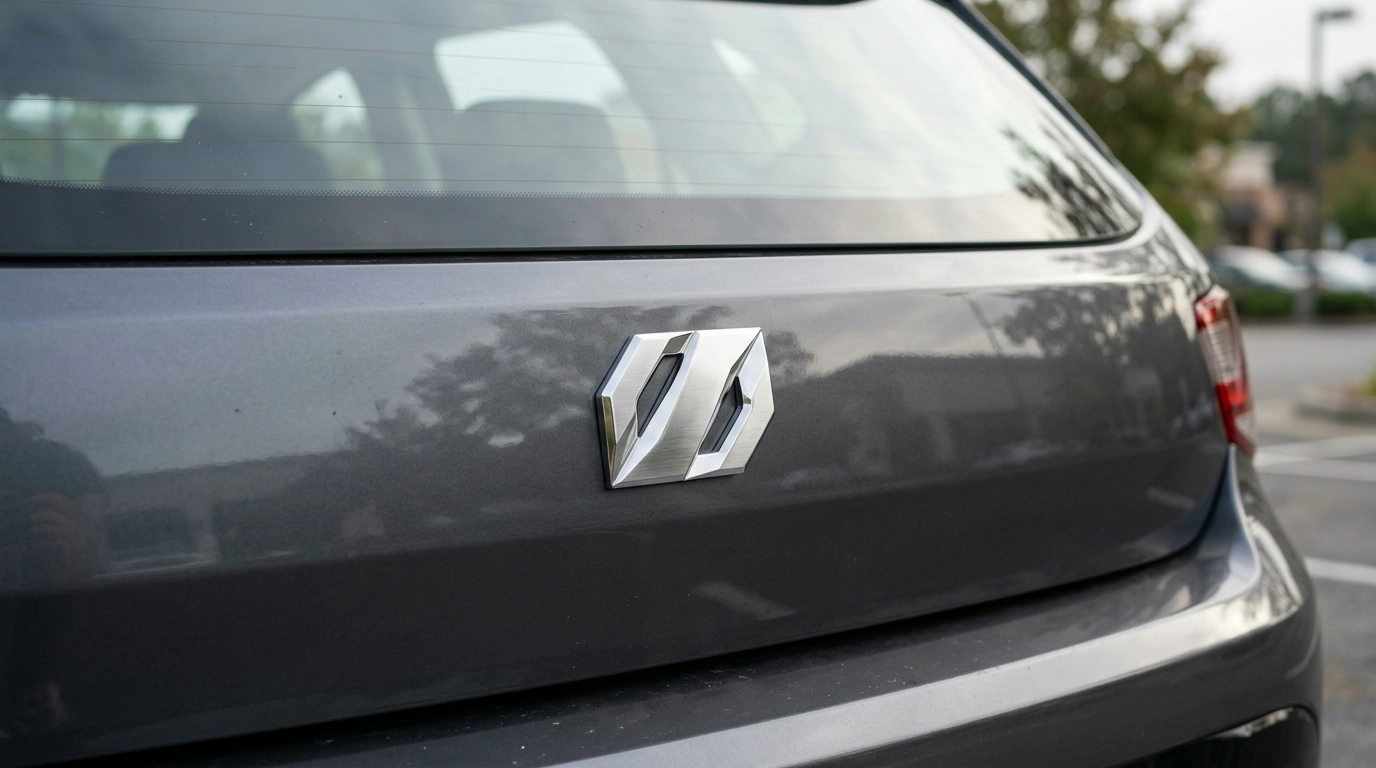
3D Metal VR6 Emblem Badge Car Logo Sticker
A small detail can change the whole look of a grille, hatch, fender, or interior trim. The 3D Metal VR6 Emblem Badge Car Logo Sticker adds a clean, motorsport-style accent with a raised metallic finish, designed for quick installation on smooth vehicle surfaces. It’s an easy way to sharpen a stock appearance, refresh an older panel, or tie together a theme build without committing to permanent modifications.
What This Emblem Adds to a Build
- Raised 3D profile for a more premium look than flat decals.
- Metallic appearance that pairs well with chrome, gloss black, and brushed trim.
- A simple refresh for older exterior panels or a clean way to personalize a factory look.
- Flexible styling: works as an exterior badge or a subtle interior accent depending on placement.
Because it’s a badge-style piece rather than a printed graphic, it creates depth and shadowing that reads “OEM-inspired” from a few steps back—especially when aligned with body lines and existing emblems.
Materials, Finish, and Feel
This emblem uses a metal body with a dimensional face that catches light differently across its raised edges. That depth matters: in daylight, the badge gains contrast, and at night it picks up reflections from streetlights and headlights. The adhesive-backed mounting keeps installation clean—no drilling, no hardware, and no need to remove interior panels.
Quick Facts
| Feature | What to Expect |
|---|---|
| Style | 3D raised emblem badge |
| Material | Metal emblem with adhesive backing |
| Use cases | Exterior panels, grille areas, hatch/trunk, interior trim |
| Install method | Peel-and-stick (no drilling) |
| Best surface | Clean, smooth, wax-free paint or trim |
For best long-term hold, treat it like any other automotive emblem installation: smooth, non-porous surfaces tend to perform best (painted panels, glass, sealed plastics, and metal trim). For general guidance on emblem attachment tapes and bonding behavior, 3M’s overview of automotive trim and emblem attachment materials is a helpful reference: 3M Automotive VHB Tape (General Guidance).
Where It Can Be Placed
- Front grille or bumper accent areas with a flat mounting spot.
- Rear hatch/trunk near existing model badges—keep spacing consistent for a factory-straight look.
- Fenders or quarter panels (avoid sharp curves that prevent full adhesive contact).
- Interior trim like dashboard accents, center console pieces, or door card inserts (only on clean, smooth plastics).
A good rule is to choose a panel area that already has visual structure (a trim edge, crease line, or neighboring emblem baseline). That makes alignment easier and keeps the badge from looking “floating” or randomly placed.
Installation Steps for a Clean, Long-Lasting Bond
- Test placement first: Use painter’s tape to preview alignment and symmetry from multiple angles.
- Clean thoroughly: Wash, dry, then wipe the area with isopropyl alcohol to remove wax, silicone, and oils.
- Warm the surface if needed: Mild warmth (sunlight or a gentle heat source) helps the adhesive grip in cool weather.
- Apply with even pressure: Press across the full badge face for 30–60 seconds, focusing on edges.
- Give it cure time: Avoid washing the area and avoid heavy rain exposure for about 24 hours when possible.
If you’re installing on a freshly painted panel, make sure the paint has fully cured before applying any adhesive badge. Fresh paint can be more vulnerable to imprinting or damage during removal/repositioning.
Choosing the Right Spot: Fit, Proportions, and Visual Balance
- Scale matters: Place the badge where it looks proportional to existing emblems and the body lines around it.
- Avoid high-flex zones: Areas that frequently bend (thin bumper corners, flexible trim) can shorten adhesive life.
- Mind heat and texture: Very rough plastics, unsealed trim, or high-heat engine-bay zones can weaken adhesion.
- Keep it level: Align using panel gaps, trim edges, or badge baselines for a factory-clean finish.
For a subtle, OEM-like result, prioritize symmetry and consistent spacing: if you place the badge near existing lettering or model emblems, measure the gap and match it rather than eyeballing.
Care and Cleaning After Installation
- Hand wash first: For the first few days, avoid direct high-pressure spray at the badge edge.
- Use pH-neutral soap: Harsh solvents can attack adhesive edges over time.
- Bug/tar removal: Soak first rather than scraping near the emblem perimeter.
- Wax/sealant cleanup: Keep buildup from collecting around edges for the cleanest outline.
For general washing best practices and how to reduce wear on exterior details, the International Carwash Association provides helpful care guidance.
Common Issues and Simple Fixes
- Badge not sticking well: Re-clean the surface with isopropyl alcohol and ensure the panel is fully dry before reapplying pressure.
- Edges lifting: Apply firm pressure again; mild warmth can help the adhesive conform to the surface.
- Crooked placement: If caught immediately, carefully lift and reposition. After strong bonding, removal may require adhesive remover and fresh tape.
- Surface damage risk: Avoid pulling aggressively on fresh paint; allow paint to cure fully before applying adhesive.
In-Stock Picks You Can Order Now
- 3D Metal VR6 Emblem Badge Car Logo Sticker ($5.01)
- LED Flashlight Smart Watch with Bluetooth Calling & 100+ Sports Modes ($38.51)
- Wireless Earbuds TWS Bluetooth 5.3 – Low Latency, HiFi Sound, Waterproof ($23.82)
FAQ
Will this emblem stick to textured plastic trim?
Adhesive badges hold best on smooth, sealed surfaces. Light texture may work if it’s thoroughly cleaned, but heavy texture reduces contact area and can cause lifting over time.
How do you remove an adhesive emblem without damaging paint?
Use gentle heat to soften the adhesive, peel slowly, then remove residue with a paint-safe adhesive remover. Wash the area afterward and reapply protection like wax or sealant if desired.
How long should the adhesive cure before washing the car?
Aim for about 24 hours before washing or exposing the badge to strong water pressure, especially in cool or humid conditions.















Leave a comment